Yayyy! Valentine's Day is here! Yay for the lovers, I just don't celebrate it!! Though I do, somehow for some weird reasons, get in the mood of it!! Here's to wishing everybody a Happy Valentine's Day!
Last year, on this day I made our classic Mauritian Napolitaines, which is one of my all-time most viewed post! So this V-Day, it had to be something as simple and easy but yet good enough, some Red Velvet Cookies!
 |
| Easy Peasy Red Velvet Cookies! |
Girls, if you have been requested to make something for your better half, then you should try this! You will not disappoint!
Read the recipe and the notes down below beforehand please!
Happy Cookie-Making!
Equipment:
- Stand Mixer/Hand Mixer (Preferably the Stand Mixer because of the paddle attachment)
- Oven
- Parchment Paper/Silicon Baking Mat
- Cling Film
- Measuring Cups/Kitchen Scale
- Refrigerator
Ingredients:
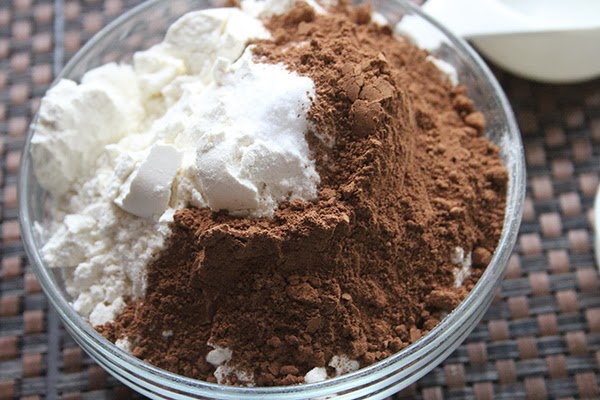
- 2 Cups All Purpose Flour
- 3 Tbsp of Unsweetened Cocoa Powder
- 1 Egg (At room temperature)
- 1/2 Tsp of Baking Powder
- 1/2 Tsp of Salt
- 170g of Butter (3/4 Cup) (At room temperature, Cubed)
- 1/2 Cup of Light Brown Sugar
- 1/4 Cup of Caster Sugar
- 1 Tsp of Vanilla Extract
- 1 Tsp of Red Food Colouring
- 1 Tsp of Lemon Juice

Makes 3 Dozens
Method:


- Mix all the dry ingredients together except the sugar. Set aside.

- Toss sugar and butter in the bowl of your stand mixer, with the paddle (k-beater) attachment in place, if using hand mixer, use the whisk itself. Start off at minimum to low speed and then proceed to medium. Let cream for a few minutes until well incorporated.

- Add the egg, let whip on high speed until well incorporated.

- Add the vanilla extract, whip a few seconds to combine, followed by the lemon juice. Whip again and then add the food colouring (now in my photo I added it as a last step just so I know the quantity but you can add it now itself).

- Carefully add the flour mixture in 3 times to the butter mixture, while making sure each time you whip at low speed.

- Transfer dough onto a plastic film and let chill in the refrigerator or 45 minutes.
- Preheat oven to 200˚C, 5 minutes before chilling time ends. Line parchment paper onto a baking sheet.
- At the end of the chilling time, roll out the cookie dough to 1/4 inch thickness. Using your cookie cutter cut into heart shapes and transfer onto parchment paper. (I use a silicone baking mat for simplicity's sake!!)
- Let bake for 8-10 minutes.
- As you remove these little babies, transfer them onto a cooling rack. They will appear soft but will harden as they cool down.
Enjoy!
Additional Notes:
- If and only if, your dough turns out to be too dry (remember this is a roll cookie dough) then add 1 Tsp of milk at a time. But as long as you stick with the recipe you won't have to add the milk.
- You will notice in my photo I have used royal icing on top of the cookie, it was just for fun! You can always make a cream cheese royal icing, but I am not a big fan! So I've just added a few drops of almond essence to the royal icing, but the cookies are delicious on their own.
- If it is your first time at roll-out cookie dough, I recommend you make the cookies in batches. When you are at the first batch, let the remaining dough rest in the refrigerator.
- Brown sugar has the undeniable purpose of making cookies chewy, so if you prefer your regular cookie, use 1 cup of caster sugar instead.


yummy, nice vibrant colour of cookies.
ReplyDeleteThank you Nandoos ;)
DeleteOne of your recipes that I will be trying soon..
ReplyDeleteThe texture really melts in the sound.. Well I am not good at describing foods in general, but this cookie, will make one want to know whats in there.
First time, I tasted it, I thought it had milk.. To my amazement, there was not any!
This cookie, evens beat my fave, Chips Ahoy from Lu.
Thank you :) Yes, indeed I had somebody else ask me whether there's any milk in the biscuit, she was surprised when I said no! Do try it, it will turn out as good as the creme brulee did, you're good a baker now :)
DeleteVery detailed tutorial,really helpful,cute cookies,happy to follow,would be really glad if you visit me n follow me back :)
ReplyDeleteThank you Harini, happy that you find it detailed, this is my aim, somehow! I'm glad to say I am a happy follower :)
Delete